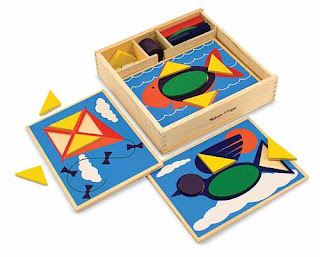
The Y received a Mellisa and Doug pattern block puzzle set a few months ago.
It says it for ages 2+. Y loves puzzles, so she immediately gravitated toward this gift. She figured out how to put all of the puzzles together after about two tries. She's known the name of the basic shapes (circle, oval, diamond, rectangle, square, and triangle) since she was about 20 months old. She's learning more complex shapes with the use of this toy:
She's learned about pentagons, hexagons, octagons, trapezoids, parallelograms, etc. with her clock toy. She spends quite a bit of time taking them out, turning the pieces over, and putting them back into place. She quickly learned that the parallelogram is the only shape that cannot be put in backward!
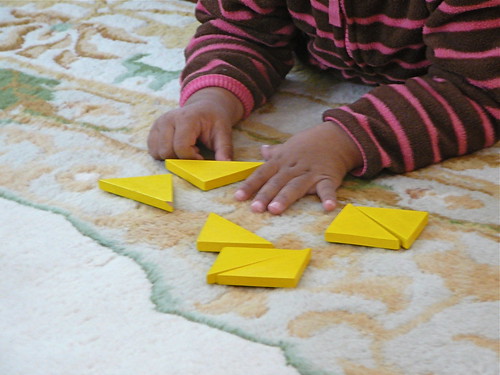
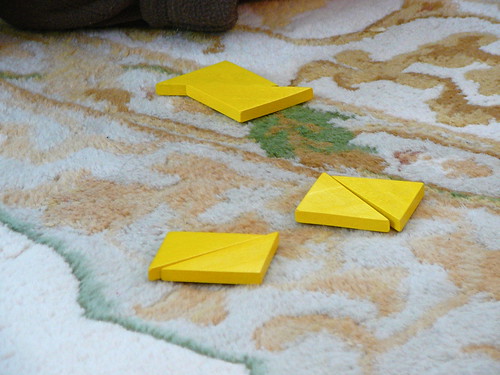
Now that she's mastered her basic pattern block set, she started using pattern blocks for what they are meant to be used for - putting the individual shapes together to make larger, more complex shapes and designs. One morning she was playing around with her pattern blocks, and she declared, "Look! I can put two triangles together to make a square!"
It's amazingly fascinating and rather satisfying watching the Y explore and discover in her own way - without an adult telling her what to do and how to do it.
12.31.2010
12.25.2010
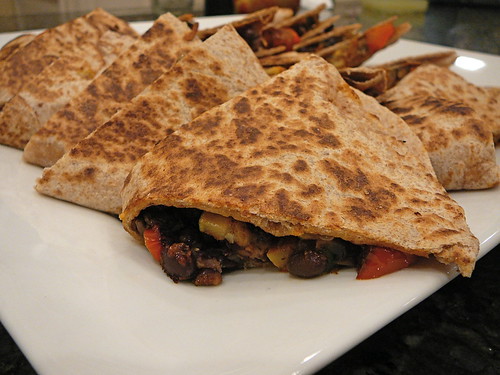
Roasted Vegetable Quesadillas
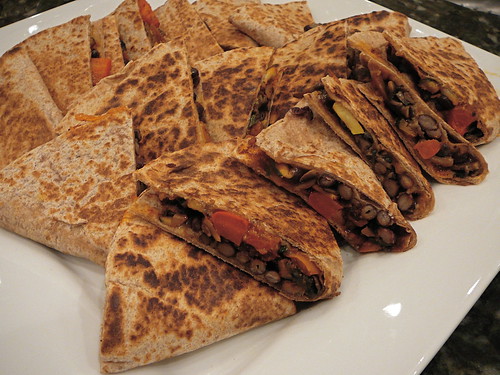
I love Tex-Mex food. I'm not quite sure why. I think there may be a few reasons. I think the primary reason is that I love most of the common ingredients found in Tex-Mex cuisine - cheese, beans, and roasted vegetables. Then there's the strong commonality of spices between Tex-Mex cuisine and Indian food (especially the cumin and cilantro). Regardless, one of our family favorites is our Roasted Vegetable Quesadillas.
The Y loves the quesadillas, and she really loves vegetables. If you ask her what her favorite foods are, she'll always include peapods, "kacha" (which means "raw") broccoli, and "kacha gobi" (which is raw cauliflower). She will literally eat a plate full of raw broccoli and cauliflower. She even gets excited when I'm chopping red, yellow, or orange bell peppers, and she'll munch on them before they're cooked. So many of my friends are shocked with they see how much the Y loves vegetables, and they often tell me stories about how their children refuse vegetables. I guess that happens with some children - they just don't like them. But, I also wonder how much of it has to do with what the children eat at home and, more importantly, what they see their parents eating. I'm nearly a vegetarian. I rarely eat red meat (maybe three times a year, if that), and when I do eat chicken or fish, it's probably twice month at the most. The Y's papa, on the other hand, is a "hard core" carnivore. Meaning, he loves, loves meat. The Y eats every meal with me, thus she sees how much I love vegetables. And even when I cook meat for the Y's papa, there's always a vegetarian alternative (which I eat). Since the Y was born, she's been surrounded by so many vegetables, and I really think that's why she loves them so much. Regardless of the "why" she loves vegetables, I'm just so happy that she does. I'm hoping it will influence her eating habits throughout her life.
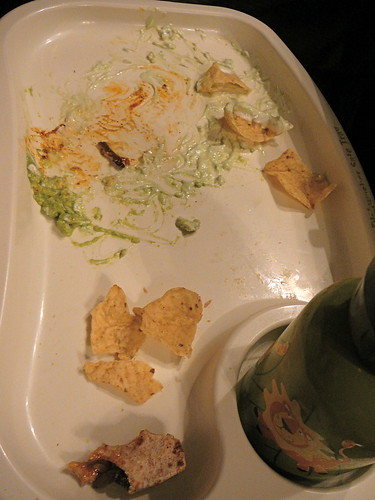
Evidence of the Y's desire to eat veggies. Here's her booster chair tray at the beginning of dinner:
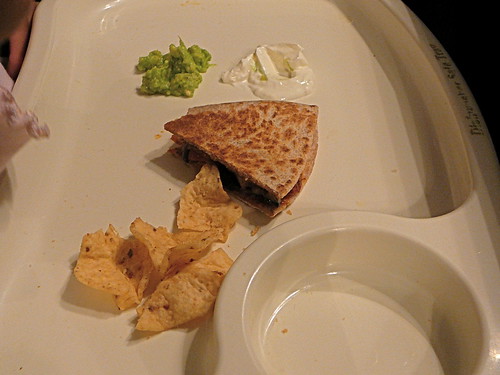
Here it is 15 minutes later:
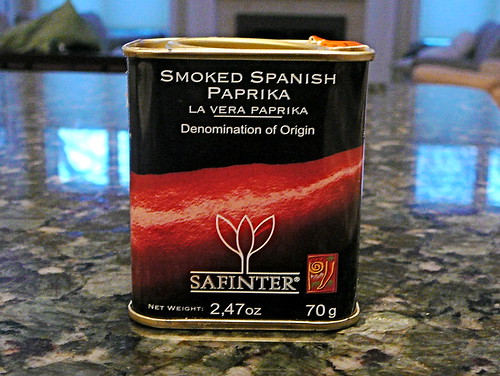
On with the recipe for the Roasted Vegetable Quesadillas. I rarely use specialty ingredients in my cooking, but I think the single ingredient that makes these quesadillas so savory and unique is the use of smoked Spanish paprika. It brings a smokiness and depth of flavor to the vegetables after roasting them for a mere 25 minutes. You can find it at Whole Foods and on the internet.
Here's the recipe:
Ingredients:*
3 bell peppers (red, yellow, and orange are our favorite. We don't like the green ones because they have a much harsher flavor)
2-3 medium sized zuchinnis
2 medium sized summer squash
1 8oz container of mushrooms
1 medium red onion
(honestly you can put any vegetables you like, sometimes we add jicama or sauted spinach)
10 whole wheat flour tortillas
Shredded cheese (we like the cheddar-jack cheese combo)
For the black beans:
2 8oz. cans of black beans
1/4 red onion, chopped fine
1 teaspoon cumin
1/2 teaspoon of corriander
2 tablespoons lime juice
Salt and pepper to taste
For the guacamole:
2 avacados
1 small clove garlic - minced
1/4 of red onion chopped, fine
1 tablespoon tomato chopped fine
lime juice to taste
salt and pepper to taste
For the Spice Rub:
2 teaspoons smoked Spanish paprika
1 teaspoon regular paprika
3 teaspoons chili powder (NOT cayenne pepper, rather the spice mix with cumin, paprika, etc.)
2 teaspoons garlic powder
1 teaspoon of dried oregano
Condiments:
Sourcream
Salsa
Chips
Directions:
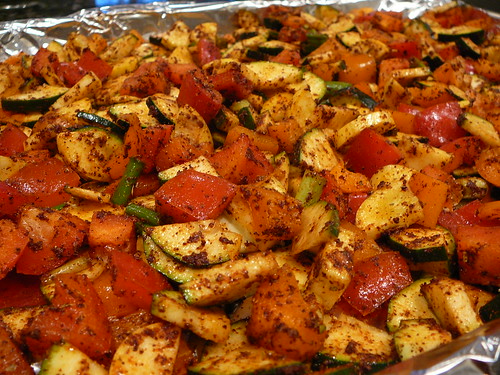
1 - Preheat the oven to 425 F. Chop the vegetables so they are bite-sized, and try to make them uniform in size so they will cook at the same rate.Mix the spice rub in a small bowl. Place all the vegetables on a baking sheet. Drizzle the vegetables with olive oil, and sprinkle spice mix and salt over vegetables. Mix the vegetables to coat all of them with the spice rub. Place in the oven to bake for 25 minutes.
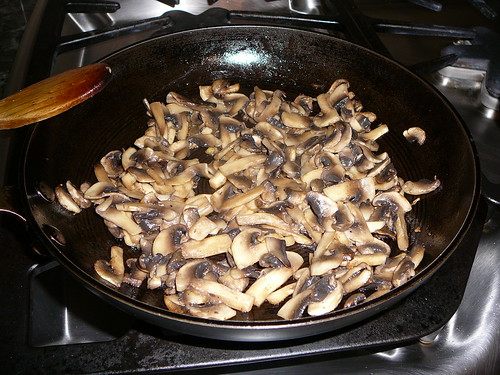
2 - While the vegetables roast, make the black beans and saute the mushrooms (and spinach if you are using it). For the black beans, saute the onions in a bit of olive oil and saute until they are soft but not brown. Add the cumin and corriander, and cook until you can smell the spices (about 30 seconds). Drain and rinse the beans. Add them to the pan and mix. Since the beans are already cooked, simply cook them long enough to absorb the flavor of the spices and onion. After about 3-4 minutes, add the lime juice. Mix and cook for a minute or two longer. Add salt and pepper to taste. For the mushrooms, slice them and saute them in a pan with olive oil. Add salt and pepper to taste. Set the beans and mushrooms aside while the vegetables finish roasting.
3 - Once the vegetables come out of the oven, make the guacamole. Mix all the guacamole ingredients, and taste to make sure there's an adequate amount of lime juice and salt and pepper.
4 - Heat a large frying pan over medium heat. Do not put oil in the pan and start assembling the quesadillas. First place the tortilla in the pan, then add shredded cheese to half of the tortilla. Next layer on the roasted vegetables, mushrooms, and black beans. Top with more cheese and fold the tortilla in half. (I like placing the cheese right next to the tortilla because the melted cheese acts as a glue to hold the quesadilla together). Once the tortilla is brown and crisp on one side, flip it over, and allow the other side brown. Remove from heat, and place on a cutting board. Cut the quesadilla into thirds. Serve with sour cream, guacamole, salsa, and chips.
*If you want to add chicken to the quesadillas, an hour before cooking, marinate 3 skinless, boneless chicken breasts in the juice of one lime and olive oil. Heat up a grill pan. Before placing the chicken on the grill, sprinkle it with salt and some of the spice mixture for the vegetables. Grill for about 7 minutes per side (the cooking time depends on the temperature of the pan and the thickness of the chicken). Once the meat has been removed from the grill and rested for 10 minutes, slice into bite-size pieces, and add into the quesadilla.
12.22.2010
Raspberry Chocolate Rugelach
Since I'm the youngest in my family (the youngest child of four), I have very fond memories running errands with my mom. She was an amazing stay-at-home mom who truly put her children first. Since there was no babysitter or nanny, wherever my mom went, we went along; especially me because I was the youngest. Often when we'd be running errands, my mom would stop at a local bakery to pick some treats up for my siblings for their after-school snack. When we'd go to the bakery, me and my older sister, Nadia, were always allowed to pick two or three cookies for ourselves. I can remember looking in the cookie case at all of the colorful cookies topped with chocolate, sprinkles, and decorative sugar. I think they were mostly butter cookies or sugar cookies just decorated differently, but I remember thinking that they each looked like jewels sitting under the lights of the cookie case. My sister always chose some jam filled cookie, and for whatever reason, I always chose these butter cookies that were twisted into the shape of a pretzel then dipped into white chocolate coating. Why would I choose a plain white cookie when there were fancy-pants decorated cookies? I have no flipping idea. I really think it was an inability to decide which fanciful cookie to choose that propelled me to choose the most bland, plain cookie in the entire place. Now whenever I go into an old-school American bakery and I see a sugar cookie pretzel dipped into white chocolate, I give into the memory of buying them in my childhood. But every time I bite into one, I'm disappointed. It tastes just as boring as it looks. My sister, on the other hand, still loves jam-filled cookies. So whenever I make a jam-filled cookie, there's always a nod to my sister, and she often gets a little bundle of cookies just for herself.
I originally made these raspberry chocolate rugelach cookies for the Mother-Daughter Cookie Exchange in 2009. Since then I've made them quite a few times. Since my sister loves jam-filled cookies, so I know I'll always have an appreciative audience. I always thought they were over-rated, but I have to admit, I really liked these. The cream cheese dough is not too sweet, and it's serves as a nice crumbly texture against the sticky, sweet jam filling. And of course, I think the chocolate only made it better!
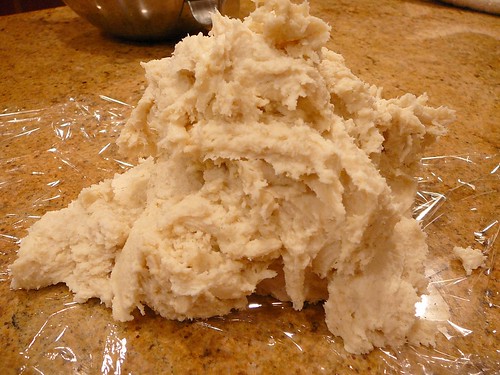
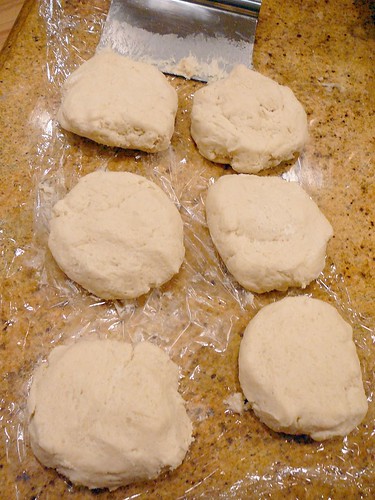
The dough is actually quite sticky once it's made. So allowing the dough to chill thoroughly is very necessary. I made the dough the night before rolling them out, thus ensuring the dough was nice and firm.
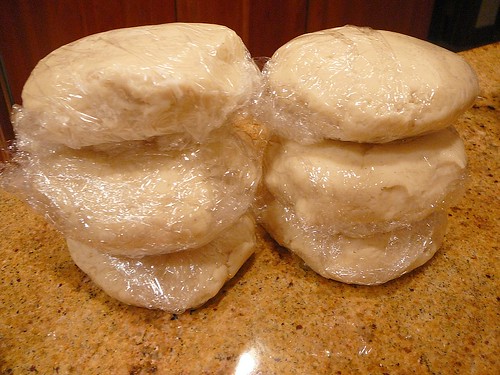
The recipe specifies dividing the dough into half, wrapping them separately to chill and roll out. I made a triple batch of the recipe, thus resulting in six dough disks.
I wrapped them individually in cling-wrap before chilling. At this point, I've actually frozen the dough for up to one month. Defrosting it in the fridge over night before proceeding with the recipe, and it works perfectly.
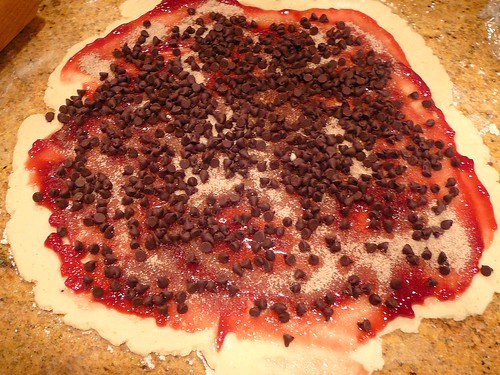
If I were a true perfectionist, I would have rolled the dough out into a perfect circle, but alas, I obviously didn't take the time to do just that. I smeared the dough with raspberry jam an sprinkled it with mini-chocolate chips.
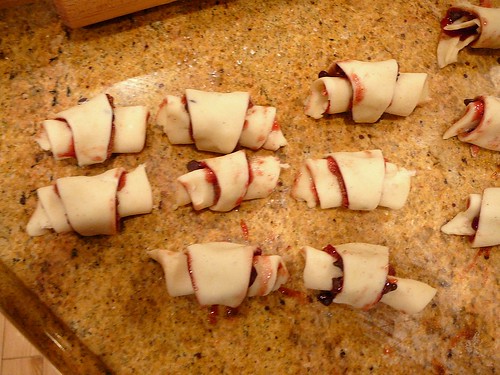
After cutting and rolling the rugelach, I thought they looked delectable (although, not perfect). Before baking, I brushed them with egg wash and sprinkled a mixture of cinnamon and sugar on top.
Here's the recipe. It's adapted from The America's Test Kitchen Family Baking Book.
Ingredients:
For the dough:
1 stick unsalted butter, softened
4 ounces cream cheese, softened
1 tablespoon sugar
1/2 teaspoon salt
1 cup (5 ounces) flour
For the Filling:
1/3 cup (2 1/2 ounces) of sugar
1 tablespoon of ground cinnamon
1/2 cup raspberry jam
1 cup (four ounces) mini-chocolate chips
2 tablespoons unsalted butter, melted
For the dough:
Beat the butter, cream cheese, sugar, vanilla, and salt together until light and fluffy. Occasionally stop the mixer to crape down the sides of the bowl. Reduce the speed of the mixer and add the flour. Mix until just combined.
Turn the mixture out onto a floured counter, divide it into two equal pieces. Wrap in plastic wrap, an d refrigerate until firm, about one hour. Pre-heat the oven to 375 F. Line two large baking sheets with parchment or a silpad.
Assembling the cookies:
Roll each piece of dough into an 11 inch circle, about 1/4 inch thick. Spread about 1/4 cup of the jam on top of each round. Then sprinkle each with 1/2 cup of chocolate chips and 1 tablespoon of the cinnamon sugar.
Using a pizza cutter, cut each dough round evenly into 16 wedges. Starting at the wide end, roll up each wedge into a cookie. Place the cookies on the prepared baking sheets, with the pointed end underneath. Place them about two inches apart.
Brush the melted butter over the cookies and sprinkle with the remaining cinnamon sugar. Bake the cookies until pale gold and slightly puffy, about 20 min. Immediately transfer the hot cookies to a wire rack and let cool completely before serving (about an hour).
Makes 32 cookies.
12.21.2010
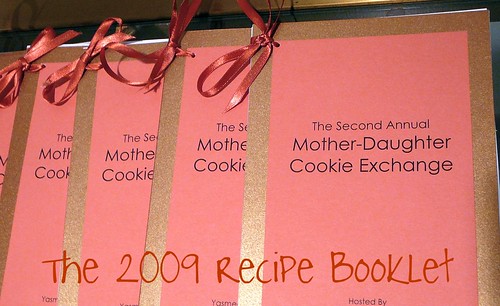
Cookie Exchange 2009
Yes - that's right, this post is about our annual Mother-Daughter Cookie Exchange in 2009. It isn't a typo. I'm just a horrible procrastinator. I'm hoping I post about this year's cookie exchange before 2011.
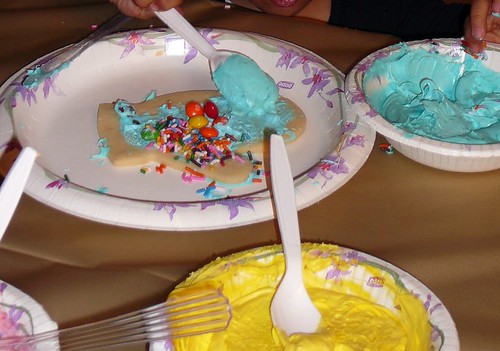
The Second Annual Mother-Daughter Cookie Exchange was held in the basement this year. Last year I did it on the main floor of our house, and it was a huge mess. I don't know what I was thinking. Mixing little children, cookies, and sugar-over load was just a recipe for disaster. Then again I was only four months post-partum for the first cookie exchange, so who knows what my sleep-deprived brain was thinking. I probably wasn't thinking too clearly at all. The other big difference between the first and second cookie exchanges is the activities. The 2009 cookie exchange featured three different activities. The first was cookie decorating. They decorated sugar cookies in the shape of mittens.
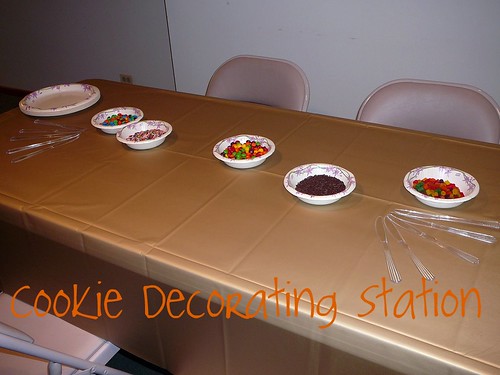
Here's one of the two cookie decorating stations. There were a variety of candies and frosting colors available to the girls for decorating.
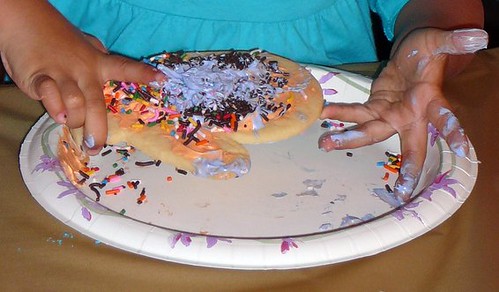
Here's are some completed cookies. Some children took the opportunity to dump as much candy on to their cookie in hopes of chowing down on the treats for days to come.
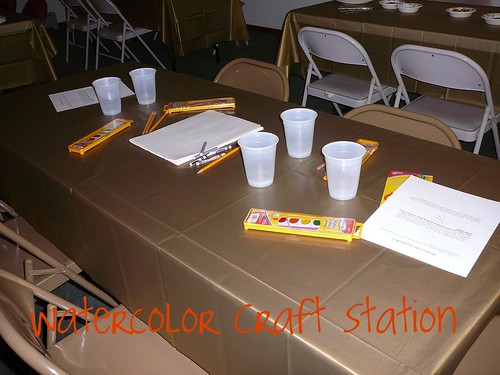
One of the other activities I thought would be fun was a watercolor crayon relief project. The children used white crayons to draw on white paper. Then they used the watercolors to "reveal" the drawing they made with the white crayon.
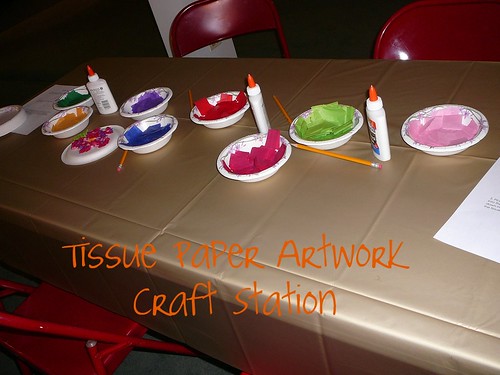
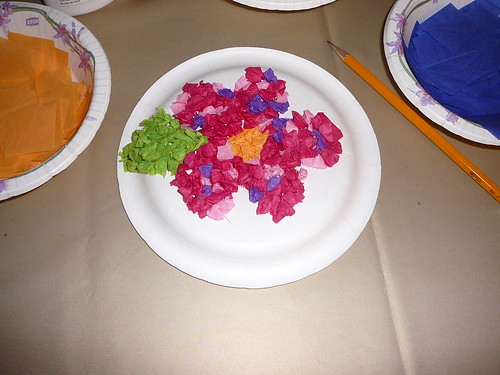
The last activity was a tissue paper craft. I didn't realize that they well pre-cut squares of tissue paper. The time I would have saved if I had known that...
This is the sample I made to help demonstrate the activity.
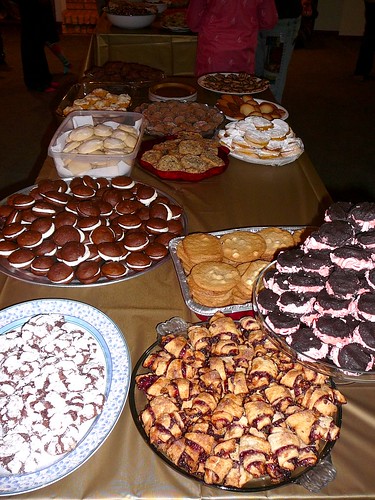
Finally, here's a picture of all the cookies. The table wasn't quite complete when I took the photo, but you can see my contributions. I made the chocolate candy cane cookies and the rugelach. You can find my post about the chocolate candy cane cookies here and the rugelach here.
Stay tuned, I'm hoping to post about the Third Annual Mother-Daughter Cookie Exchange soon!
Labels:
cookie exchange,
cookies,
crafts for kids,
entertaining
12.20.2010
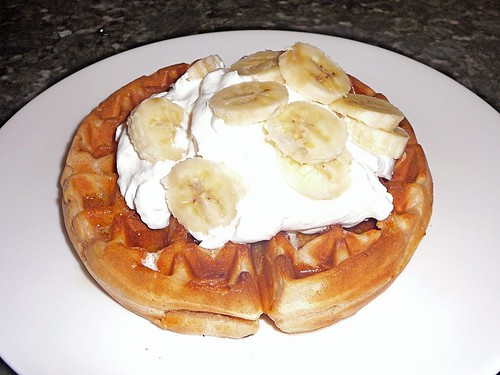
Whole Wheat Waffles
For as long as I can remember, Sunday morning breakfasts have been special. Actually it was our Sunday brunch that provided a platform for me and my siblings to experiment with cooking. When my siblings and I took over the brunch-making duties from my parents we were making pancakes from Bisquick mix, and it was a feat to make an omelet without it falling apart. When my older sister, Nadia, was probably eleven or ten she decided to write everyone's name on their pancakes. And she wrote our names in cursive. Yup, cursive. It wasn't like a needed another reason to want to be just like Nadia, but the cursive-personalized pancakes was just another reason I wanted to be cool like her. Heck, I was eight years old at the time, so being impressed by my older sister wasn't too difficult. But honestly, it was the creativity of my older sibs opened the flood gates for new recipes. We tried stuffed french toast, crepes, and even homemade bread.
Now that I have my own little family, we've also adopted the Sunday brunch tradition. We forgo the weekday cereal and oatmeal, and opt for a real breakfast with both savory and sweet options. That usually translates to an egg dish (usually an omelet but on special occasions we have poached eggs with roasted mushrooms), potatoes, toast, and pancakes. Occasionally we have sticky bun, cinnamon rolls, homemade bread, or banana chocolate bread. But there's been a recent addition to the regular Sunday morning lineup: waffles! My sister in-laws got me this waffle maker for my birthday:
It's called the Presto 3510 FlipSide Belgian Waffle Maker.
It is reasonably priced (it sells on Amazon for about forty dollars and qualifies for free shipping) and cooks waffles consistently and evenly. I have yet to be letdown by my new gadget. I tried a few recipes for waffles, some made with yeast (they were too dense for my taste), some with buttermilk, and some with wholewheat. After quite a bit of sampling we've found a favorite. I'm not sure where this recipe came from because my sister in-law adapted it from a website she found, and I slightly adapted her recipe to make it my own.
Ingredients:
2 cups whole wheat flour (this can be substituted with white wheat flour, I've used the King Arthur brand of white wheat flour and it's worked out well)
2 large eggs
2 cups of milk
1/2 cup of vegetable oil
2 teaspoons brown sugar
4 teaspoons baking powder
1/4 teaspoon salt
1 teaspoon vanilla
1/2 teaspoon of cinnamon
Mix all the dry ingredients in a large bowl (flour, sugar, baking powder, salt, and cinnamon). In a separate bowl mix the milk, eggs, vegetable oil, and vanilla. Add the wet ingredients to the dry ingredients and whisk together. Follow the directions for your own waffle iron. On my waffle iron it makes five full sized waffles (I often make only a quarter of a waffle for the little Y).
12.18.2010
Potty Training - Day #2
It's below zero outside. The wind is howling. Why not potty train? I know it sounds like a non sequitur, but there's some logic behind my thinking. I'm sure there are tons of valid ways to potty train a child, and my general philosophy toward parenting is: "Do whatever is right for your child and your family." That being said, after some reading and a lot of discussions with my two sisters (who have eight children between them - seven of eight who are potty trained), I decided to stay home for the next seven to ten days (!) while we potty train. That way I can avoid the use of pull-ups or diapers during the day. Thus, the winter time is perfect - we can't really spend a lot of time outside and we're already relinquished to activities at home, so why not be productive with the potty training?
The Y has actually been using the toilet since she was about 18 months old. She started to tell us when she had to pee and poo at 12 months, so her pediatrician suggested we start putting her on the toilet before her shower. By the time Y was 18 months old, she peed and pooped on the toilet every night before her shower. So, the potty training has been going pretty smoothly - no fears about flushing or pooping on the toilet. She actually has a revolving stack of books by the toilet to keep her company. The only hick up in the training is that she doesn't want to stop playing to sit on the toilet. So my solution has been to put her on the toilet (no questions asked) every 15 to twenty minutes.
The Y has a toilet seat that fits over the regular toilet seat. It has her favorite sesame street characters on it: Elmo, Dorthy, Ernie, Rubber Ducky, Oscar, Slimy, and Cookie Monster. She also has one of these:
I have to admit that I'm getting crazy staying at home. I never realized how much we value being out and about on play-dates, in nature, or even going to the grocery story! In an attempt to keep myself from going crazy we are working on a few projects - an alphabet book, baking, and I've been knitting some fruits and vegetables for the Y's shopping cart.
This is how she received her shopping cart on Eid morning. When she saw her shopping cart, she started clapping, screaming, and running around in circles. She'd been asking for a shopping cart for the past six months or so. But, it couldn't be any shopping cart. She specified that it had to be like the Trader Joe's one - "hard" and "silver." Basically she refused to have a plastic cart because as she put it, "those aren't real shopping carts." In the bottom of the cart you can see some knitted apples, lemons, and eggplants. While we chat in the bathroom while the Y "reads" and tries to poop, I've been knitting some pears to add to the cart. Hopefully I'll post a whole blog entry on the knitted fruits and veggies once they are complete.
I'm hoping that ten days from now we'll be pretty much diaper-free in our household. Now only if we can get through the next eight days without going crazy from cabin-fever!
12.17.2010
Y's First Snow Adventure
The Y and I love, love being outside, but since we live in the upper-midwest, the we have limited time outside for three months of the year. I don't mind snow, but it's the wind and the frigid temperatures that keep us indoors. So on December 5th, when we had our first snow of the year, we couldn't help ourselves. We had to go outside and play. Y was bundled up in a long-sleeved undershirt, wool long underwear, a sweater, fleece, and snow jumper. Her legs were also layered: wool long underwear, fleece pants, legwarmers, socks, boots, and her snow jumper. Here she is trying to balance in the snow:
Needless to say, her snow outing was filled with laughter, excitement, and creativity. She built her first snowman, who she named Chasenall. Chasenall is also the name of a game the Y created where you run around in a circle with a ball of yarn trailing behind you, yelling "Chasenall! Chasenall!" She loves playing Chasenall with her Papa and Aunt. She wanted Chasenall (the snowman) to have a carrot nose and chocolate covered blueberries for eyes. After playing outside for about 45 minutes, the snow turned very wet, and it was getting too cold. After stripping off our wet layers, the Y enjoyed a cup of hot chocolate and a Trader Joe's Candy Cane Joe Joe's cookie. (If you've never had one of a Candy Cane Joe Joe, you are missing out on a scrumptious treat.)
We have yet to experience another snowfall with actual accumulation because it's been too cold outside. But when the next snow storm comes (and I'm sure they'll be many more this winter), I know the Y will chomping at the bit to play outside, and I'll be right there with her!
11.24.2010
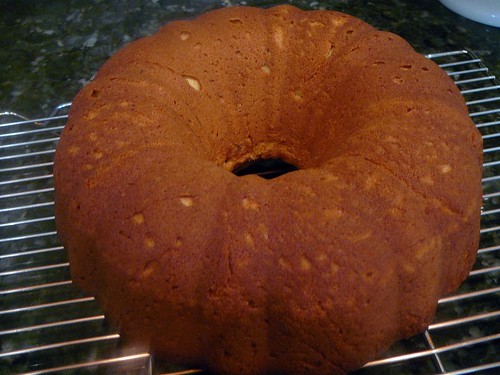
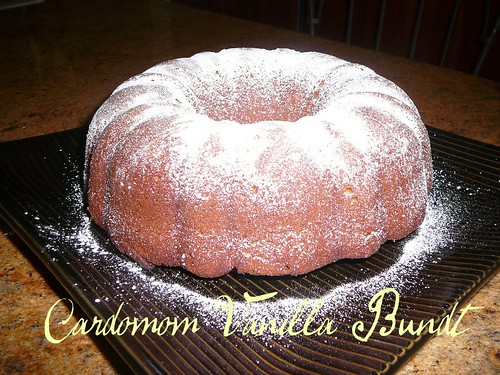
Cardomom Vanilla Bundt Cake
The town where I was born and raised does not have a bakery. Yup - no joke. There is no bakery. Actually there isn't even a downtown. To be fair, I didn't grow up in a city. It isn't even large enough to be called a town. It's technically a village, and our downtown is an outdoor mall. I know that sounds cringe-worthy, and to be completely honest, the village I grew up in is made up of *gasp* gated communities. So, that should give a little more perspective on the lack of a bakery where I grew up. That being said, the towns surrounding my village are much more quaint and traditional - with genuine downtown areas, and plenty of mom-and-pop businesses including bakeries.
One of the bakeries my parents' favored is called Ingram's Busy Bee Bakery. Our hands-down favorite item from the bakery was cardamom bread (we simply called it "hard bread"). It's day-old bread (I'm not quite sure what type of bread - maybe it's a brioche) that's toasted then sprinkled with a generous amount of granulated sugar (I think it may actually be sugar scented with vanilla beans) and ground cardamom. My parents enjoyed it with tea, and we loved dipping it into a cold glass of milk.
Looking back on our love for cardamom bread, it makes me appreciate the range of tastes and spices we were exposed to as children. One of the first cups of tea I ever consumed was when I was maybe seven or eight. It was a chai (tea mixed with milk) that was pink (yes, pink!) and it was infused with cardamom, cinnamon, and served with chunks of green pistachios. When most of my classmates were excited to have spaghetti and meatballs for dinner, I always looked forward to a soup made of brown lentils garnished with fried cumin seeds, garlic chips, and fresh coriander. To say the least, my earliest food memories are unique.
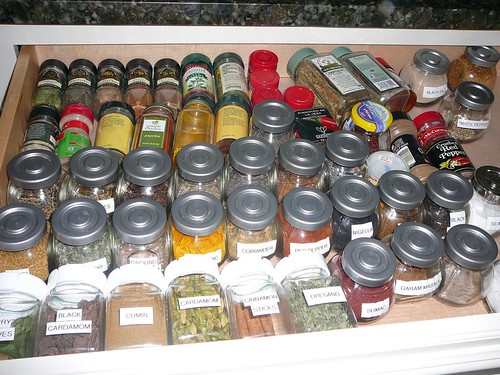
Without even consciously thinking about it, I've exposed the little Y to a wide variety of foods (I think she's consumed nearly every lentil in existence in nearly every form - fried, stewed, sprouted, steamed, baked, and raw) and spices. Here's our spice drawer:
There's everything in there: cumin seeds, coriander seeds, nigella seeds, mustard seeds (black and yellow), cinnamon sticks, cloves, peppercorns, curry leaves, turmeric, black and green cardamom, dried red pepper and it's flaked version, fenugreek, smoked paprika...the list goes on and on. Since I spend so much time in the kitchen, the Y has been poking around the spice drawer since she was probably ten months old. I've let her smell the spice containers and taste quite a few of them. (She particularly loves the smell of the black cardamom which I think smells horribly strong and musty). When we go out to restaurants the Y often asks to have "mashki daal" (steamed lentils with turmeric, chunks of ginger, cumin, coriander, and garlic) or biryanni (probably the most famous Indian/Pakistani dish in the west - rice pilaf laden with spices and meat). My parents and in-laws love witnessing the Y's connection to her cultural heritage through food (and to be honest, I feel just as grateful because when we visit the homeland, we feel like and are seen as tourists more than locals.)
The cardamom bundt was the result of searching for a suitable birthday cake for my dad. Every year when my dad's birthday rolls around, I know that the usual crowd-pleasing chocolate cake will not cut it. For all the years I've been baking cakes for my dad's birthday, I'd never really come across a cake that he has fallen head-over-heals in love with. He loves the play between sweet and savory - thus he enjoys gingery, peppery, desserts more than syrupy sweet confections. So, I went a hunting for a cake with bolder flavors, and when I came across this recipe for a cardamom vanilla bundt, I knew I hit the jackpot. My first thought was "hard bread," and my next thought was I think it'll be a crowd pleaser for all the adults in my family because of the strong food memory we all had with cardamom toast.
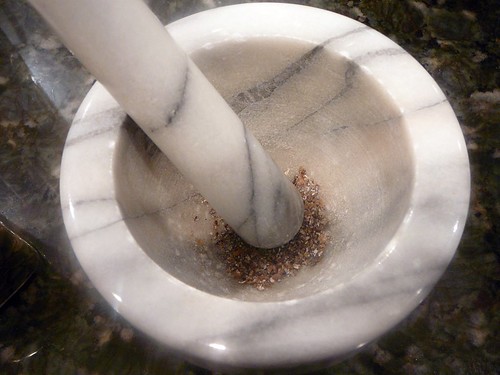
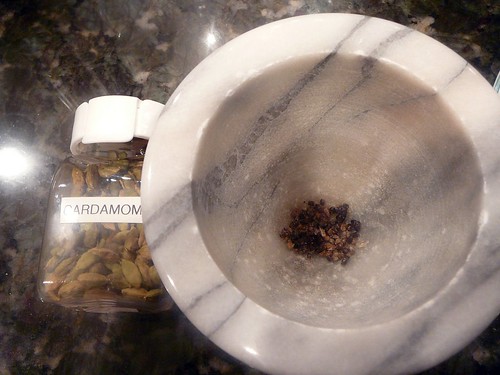
Instead of buying cardamom powder, I made my own by opening up green cardamom pods and grinding the little black seeds. I ground them by hand, but it could have easily been done using a coffee grounder reserved for spices. My sister in-law shared an extremely helpful tip about cleaning out spice grinders - she said to place one teaspoon of uncooked white rice into the grinder in order to remove any residual oils left by the spice previously ground in the coffee grinder.
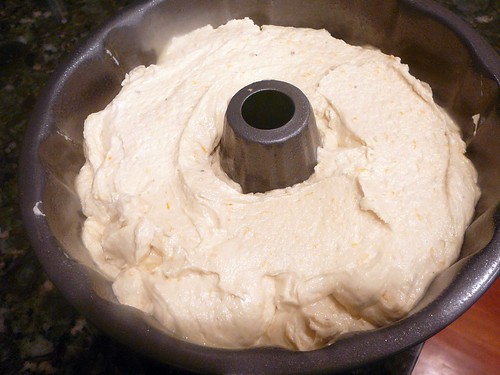
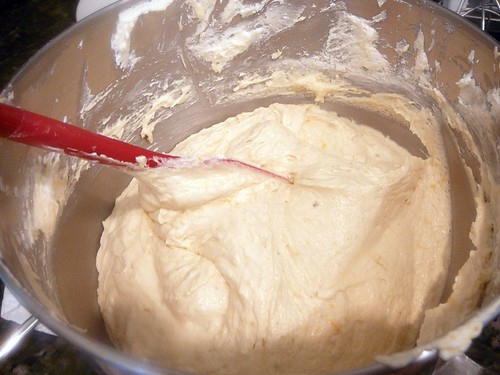
The batter is light and fluffy once all the ingredients are creamed together.
I used a 12 cup bundt pan. In this photo, you can see little specs of orange peel in the batter. I tried one version of this cake with one tablespoon of orange peel. It tasted fine, but the orange overpowered the vanilla and it even muted the cardamom taste.
The original recipe for the cardamom vanilla bundt cake can be found here. I made a few changes:
1 - Reduced the butter to two sticks
2 - Reduced the sugar to one cup
3 - Substituted buttermilk for the plain milk (and I kept the lemon juice)
4 - Omitted the topping
5 - Baked it for 50 min.
8.29.2010
The Freshman 15 - Thanks to a Whole Bunch of Scones
When my sister hosted a play date for a few of our close friends and our little buggers, I knew it would be a good opportunity to do some baking. The only question was, should I make something for the adults or the kids? Since my nephew has a peanut and dairy allergy, my sister adamantly stated, "Make something for us, the moms." The possibilities were endless...cake? cupcakes? cookies? a tart? Then I remembered my sister and her best friend from college and their affinity for scones.
What made me remember? Well, there's a picture from my sister's freshman year in college that's sort of burned into my memory. My sister is two years older than me, so when she returned home from her first year in college, I remember eagerly looking through an album she made documenting her first year at school. One of the pictures shocked me (and no, the picture had nothing to do with illegal substances or nudity). I remember nearly falling off of my chair when I saw it. It was my sister Nadia and her best friend, Lena, sitting at a fondue restaurant. They were both wearing these God-awful ribbed, knit turtleneck sweaters (this was the late 90's people) that fit a bit too snugly against their plump bodies. Look, anybody who knows Nadia and Lena, would NEVER describe them as plump. My sister has always been skinny with an athletic build. Always. But in this picture, she looked like an overstuffed sausage with her rounded head popping out of the neck of her too-tight sweater. I didn't giggle when I saw the picture. I was too shocked to speak. Instead I asked her what the heck happened. She shrugged her shoulders and mumbled something about the freshman fifteen. Aaaaah, the freshman fifteen: Gaining weight during the first year of college. I knew it happened, but I guess it could even happen to my "I never gain a pound no matter how much I eat" older sister. She must have gained more than fifteen pounds her freshman year because I swear, she wasn't ever that fat when she was pregnant with each of her three children.
Shifting my eyes from the picture in my lap to her face, she didn't seem as chubby sitting in front of me. Without even asking she simply said "Scones." So she was blaming scones for her freshman fifteen? How the heck many scones was she wolfing down at college? Apparently a lot. A ton. Way more than normal. Way more. I guess it was the product of a misunderstanding. Somehow Nadia and Lena convinced themselves that scones were not that fattening (!). I guess their logic went something like this: Scones are dry, thus they must not be made with that much fat. So, instead of choosing fattening muffins, let's choose the healthier, lower fat scone instead.
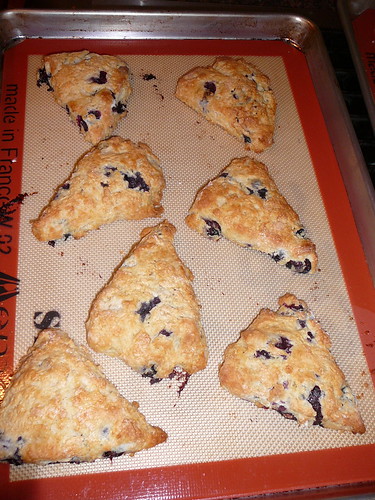
Apparently every time they grabbed a cup of coffee from Norris (the student union) or Starbucks, they opted for a scone rather than a muffin because they thought they were making a healthier, lower-fat choice. Aye, aye, aye. When Nadia explained her scone theory to me, all I could do was slap my hand against my forehead while shaking my head in disbelief. Scones my be a drier texture than muffins, but that does not translate to being made with less fat. Sorry ladies, but scones often have more butter than muffins and thus more fat! I don't think Nadia has ever looked at a scone the same way since her freshman year in college. I'm just glad that her scone freshman fifteen memory hasn't put her off of scones permanently. When I entered her kitchen with a plate of blueberry and chocolate chip scones, I swear I heard her say that she loved me.
These recipes are adapted from a dozen or so scone recipes, plus a few of my own little adjustments here and there:
Blueberry Scones:
2 cups all purpose flour
1 teaspoon cream of tartar
1/2 teaspoon baking soda
1/2 teaspoon salt
2 tablespoons of sugar
6 tablespoons unsalted butter, chilled and cut into 1/2 inch pieces
1 pint of blueberries
3/4 cup whole milk
1 teaspoon grated lemon zest
For the Glaze:
1 1/2 cups sifted powdered sugar
1 tablespoon lemon extract
2 tablespoons water
Preheat the oven to 450 degrees F
Sift all the dry ingredients (including sugar) in a medium bowl
Mix in the lemon zest
Cut the butter into the dry ingredients using a pastry cutter, fork, knives, or your clean, cold fingers (my preference!) until the mixture resembles coarse meal with larger chunks of butter.
Mix in the blueberries
Make a well in the center of the bowl and pour in the milk. Blend all the ingredients together quickly with a rubber spatula.
Turn wet dough out onto a well floured work surface
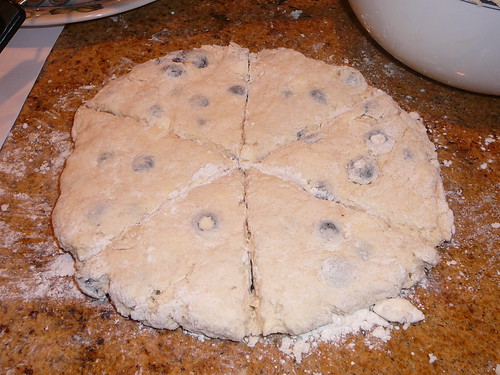
Pat or roll dough out into a 9 to 12 inch circle.
Cut into 6 or 8 pieces (see photo)
Place on greased baking sheets
Bake for 15 min or until scones are slightly brown on top
While scones cool, mix the ingredients for the lemon glaze
Pour glaze over cooled scones.
Chocolate Chip Scones:
Same ingredients and methods as the blueberry scones with the following changes:
Substitute the blueberries for 1/2 cup chocolate chips
Increase sugar to 1/4 cup
Omit the lemon zest
Omit the glaze
8.22.2010
Hmmm...how many different colors can I make?
I'm sure you all know that annoying friend who finds a song she/he loves, and they keep playing it over and over again. You don't want to ride in her/his car because the music selection will be an issue (do you really want to listen to Party in the USA on loop?). Well, my friends, I am one of those people! Thank God iPods were invented because now I can be addicted to my own songs, and I can shut out everyone else's whining. These days, I'm obsessed with Angus and Julia Stone, particularly their song "And the Boys." So, amazing.
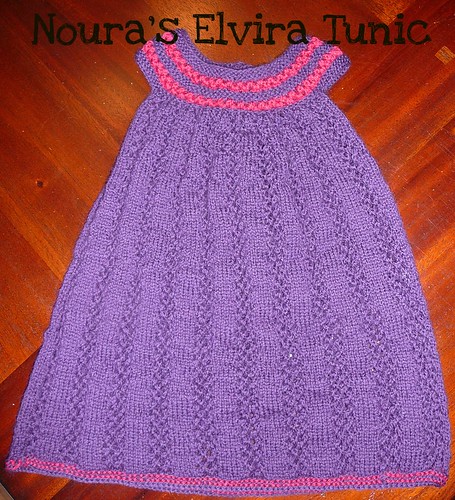
My obsession with replaying songs I love can sometimes carry over to certain culinary creations that are adored by my friends and family, and on occasion the same can be said about knitting patterns. Especially those patterns that are easy (knit in the round with an easy-to-memorize pattern), functional (the person receiving the gift will actually wear it), and beautiful. That can most certainly be said about Elvira by Sanne Bejerregaard (you can also purchase the PDF pattern off of Ravelry).
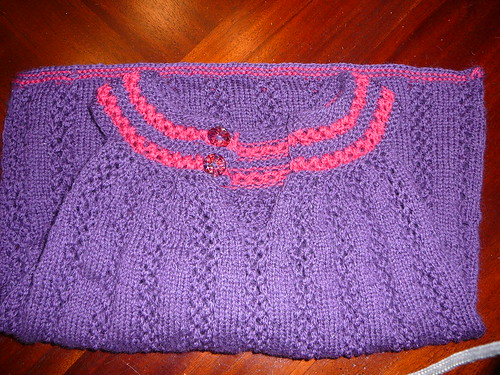
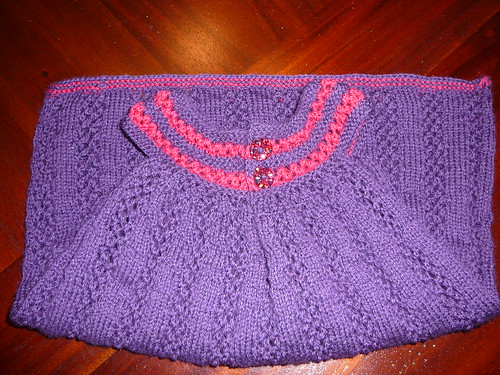
This is the version I made for my friend's daughter. It isn't blocked, so please, ignore the slight crinkle in the yarn!
My favorite part of tunic/dress are the buttons. Little Y chose them. She was only 18 months old when I asked her to choose buttons that matched the dress (she already knew her colors by then). So as we sat in the huge button isle of a mega fabric store by our house, she giggled at all the buttons shaped like animals and grabbed for the ones sparkled like resin poured into a rhinestone mold (wait, that's exactly what they were - cheap rhinestone buttons). Then she laid her hands on the ones she finally chose. They look like stained glass, and they match perfectly without it being too perfect.
I will definitely be making this dress again, now all I have to do is decide which colors...
8.15.2010
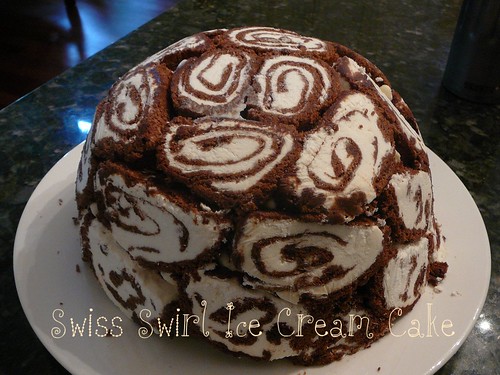
Swiss Swirl Ice Cream Cake - Daring Bakers
This month's Daring Baker's challenge really caught my attention (Who am I kidding? Every challenge thus far has done just that...) Swiss cakes (a sponge cake that's baked flat, then slathered with a filling, then rolled up and sliced) never interested me. I guess it's because it reminded me of those pre-packed Swiss Rolls made by Little Debbie. I have to admit that I was obsessed with them when I was growing up. Not because they tasted good. Nope. I wanted those trans-fat-filled, artificially flavored, corn syrup laced snacks only because I wasn't allowed to have them. My mom NEVER bought them. On occasion she would give in and buy the Little Debbie Oatmeal Pies (Yummmm! Now those actually taste good - well at least I think they do because it's been something like fifteen years, possibly longer, since I've eaten one). The main reason this challenge appealed to me is because the recipe called for making your own ice cream without the use of an ice cream maker. Huh...thought that wasn't possible.
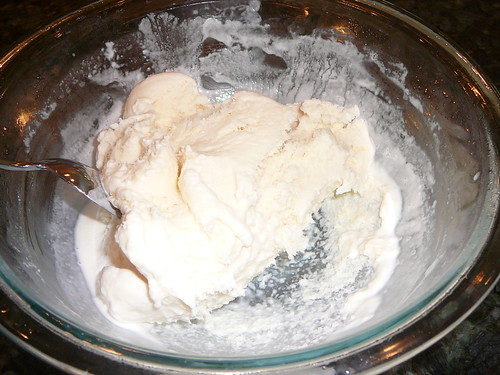
Below is the vanilla ice cream. Turned out pretty nicely - smooth consistency and pretty robust flavor. It was my husband's favorite part of the dessert, and he truly hearts ice cream. That being said, I have to say, making my own ice cream has pretty much ruined eating ice cream for me. Ice cream's never been that high on my list of desserts. I have a cost-benefit analysis that all desserts that I consume must be subjected to prior to ingesting them. It all has to do with a saying I remember my seventh grade Spanish teacher uttering as she laced up her running shoes over her pantyhose before heading off on her afternoon power walk around the school, "A minute on your lips and an eternity on your hips." If I'm going eat something that will inevitably find it's way to my pouch or bum, it better be worth it. Ice cream just doesn't pass my rigorous dessert analysis, and after making homemade ice cream, yeah, I won't be rushing out for a cone or quart of ice cream any time soon. No sir. I can't even eat a bowl of cereal with whole milk because the whole milk is so thick it makes me want to gag, so there's no way I can consume of bowl of ice cream without remembering how much flipping cream I poured into the bowl to make the ice cream for this dessert. Just thinking about it makes me shiver.
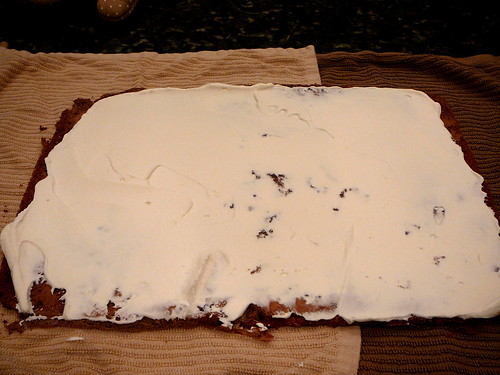
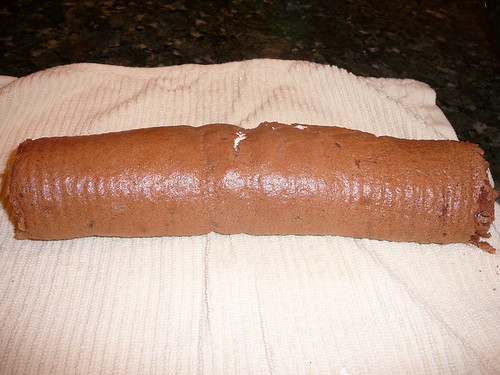
Making the sponge cake for the dessert was much more of a pleasant experience. The texture of the cake was light and airy, and the cake was quite satisfying in it's chocolate flavor. What I didn't really enjoy was the whipped cream filling. It was fine when at room temperature, but because the entire dessert has to be frozen when put together, the frozen whipped cream didn't do it for me. Here are the Swiss Rolls:
I've loved the Daring Bakers, but alas I've decided that this is my last challenge. I have too many of my own recipes lined up to try, so I have to say farewell to the group in order to make room for my own agenda!
Subscribe to:
Posts (Atom)